Assembling a 1 Layer Raspberry Pi 4/3/2 Model B Acrylic Case with cooling fan
Posted on Fri 19 August 2022 in Other
بِسْمِ ٱللَّٰهِ ٱلرَّحْمَٰنِ ٱلرَّحِيمِ
I purchased a 1 layer Raspberry Pi 4/3/2 Model B acrylic case with cooling fan that looks like this:
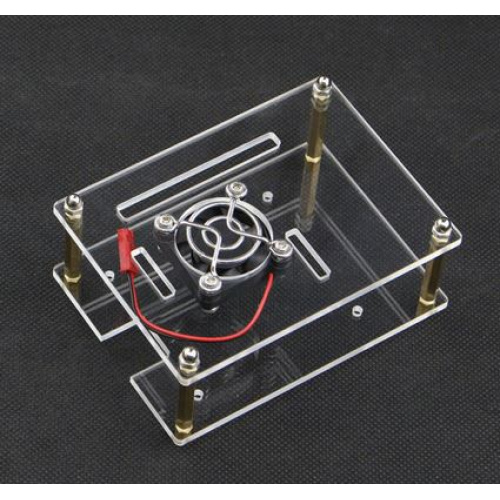
Many other tutorials have assemblies of alternate Acrylic cases that are usually enclosed. This tutorial will show the assembly of this specific acrylic case that is not enclosed.
The proper names for this style of casing are:
- Elisona single layer clear case
- High Clear acrylic case
Parts
The items that come in the package are:
- 2 acrylic cases (top and bottom)
- a fan with nuts and screws
- a cage (for the fan), legs to hold the cases and more nuts, screws and ball-nuts
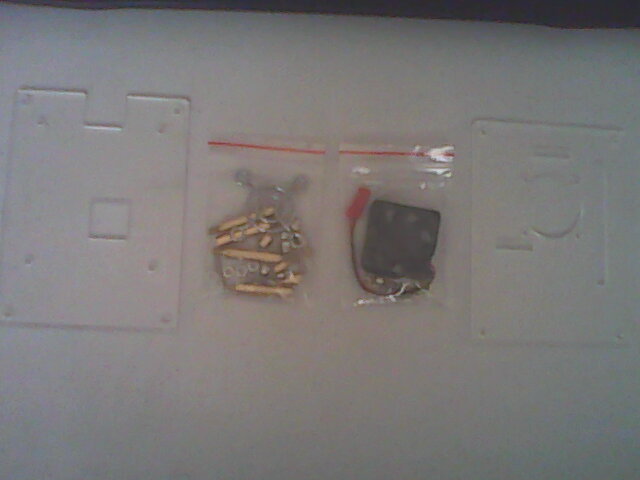
Remove the plastic sheets covering the acrylic cases. A total of 4 sheets are present.
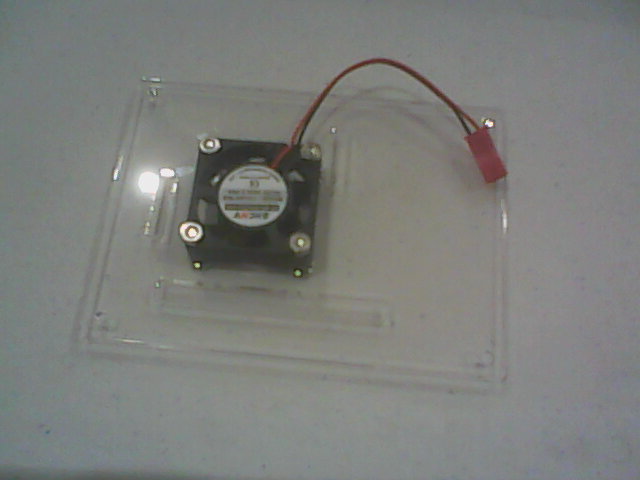
Fan Case Assembly
Start with the fan assembly. Position the acrylic case with the circular hole exactly as the picture above. The long rectangular hole faces down and the small rectangular hole closest to the edge facing left.
Place the fan with the sticker facing you. The cable should run out opposite the long rectangular hole.
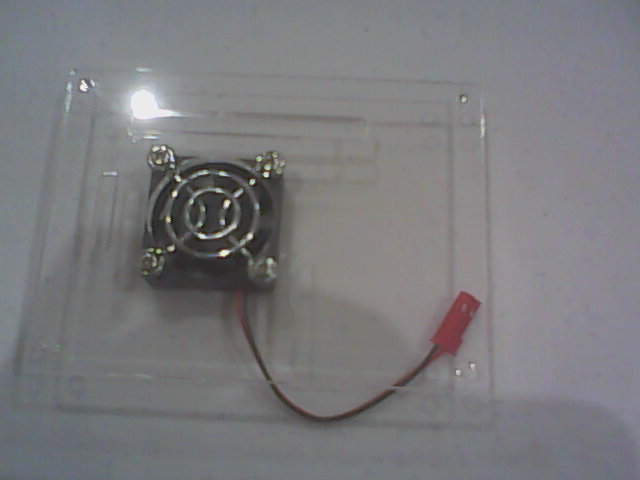
On the reverse side, place the cage with the indent downwards. It is easier to tighten the nuts on the fan and run the screws through the cage. This is recommended.
With everything in place, tighten the nuts and the result will be:
Other Case Assembly
First connect the Raspberry Pi (I am using a Model 3) to the other case. The memory card slot is positioned with the indent (so that inserting the card is possible). The bottom of the Pi will be placed on the top of the acrylic.
The 4 plastic 'nuts' will be placed in between so that the board does not make contact with the case.
Either the screws or the nuts can be placed through the holes on the Pi. It is easier to place the screws. The screws will travel down the board, through the plastic 'nuts', through the case and secured by the nuts on the other side.
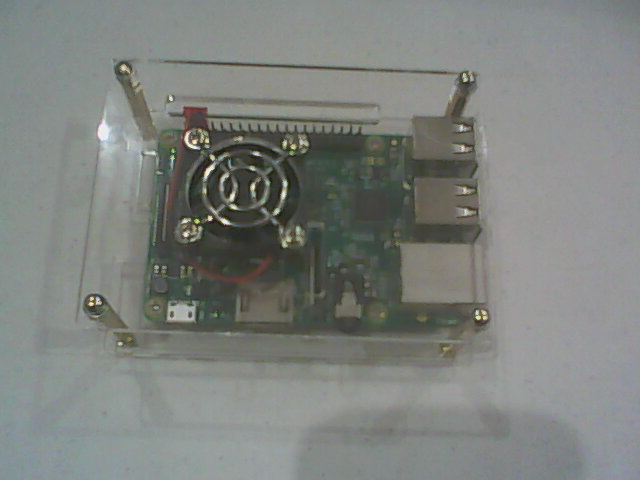
The end result is:

Final Assembly
On the case with the Pi, the small gold screw is placed at the bottom and the large gold screw above the casing. Tighten the 4 small and large gold screws together.
Connect the red fan plug to the correct GPIO pin. It will be the outer row with the red wire connecting to pin 2 and the black wire to pin 3.
Place the fan case with the cage facing up, on top of the other casing, with each rectangular hole coinciding with a connector below it. The tips of the 4 large gold screws will pass through the holes on the fan acrylic case.
Use the ball-nuts at the top and tighten them. The assembly is now complete.
(A word of caution to not use a plier to tighten the nuts. Opt for a socket wrench instead)
Video Tutorial
A video tutorial is available here (invidious redirect)
If you don't know how to use RSS and want email updates on my new content, consider Joining my Newsletter
The original content of this blog is a Waqf solely for the Pleasure of Allah. You are hereby granted full permission to copy, download, distribute, publish and share this content without modification under condition that full attribution is given to this author by creating a link either above or below the content that links back to the original source of the content. For any questions or ambiguity, you are requested to contact me via email for clarification.