Guerrilla guide to using Docker
Posted on Tue 19 May 2015 in Docker
This is a quick-start intro to using Docker. For the long-form version of "Getting Started with Docker" please see: Docker Basics
This tutorial should take you less than 15 minutes to get up and running with Docker (this excludes the time it takes to install Docker itself and downloading of the source files). Also note that this tutorial assumes you are using Ubuntu (or a variant thereof).
If you haven't installed Docker already, go ahead and use the link above to install it.
Images, Containers and Dockerfiles
Image: Think of this as a static snapshot of your Docker setup. Images are layered on top of each other like an onion, so that it does not duplicate the same core files repeatedly (for example, creating many different "stacks" on top of an Ubuntu image will not recreate Ubuntu each time). Images are never used explicitly and are used as the base for creating Containers.
Container: Containers are dynamic versions of Images. Think of a Container as the fake version of priceless art. You would never touch or damage the original (Image) but you can do whatever you like with a fake (Container). Containers can be made, modified and destroyed very easily (they also act as the tool for building on images)
Dockerfile: This is the formal method of building Images. Think of the Dockerfile as a Shell Script for installing something (it works almost exactly the same).
Building an Image: Ubuntu + Python
Let us first create a Docker folder. Open up your File Manager and create a folder so that you get this path:
/home/[USER]/Docker/
Now, I will walk you through my simple Dockerfile for this (you can download it here: File )
Here is the output:
#
# Dockerfile to use as a base for python
#
# Combines Ubuntu + Python
#
# https://github.com/Kentoseth/Docker/tree/master/UbuntuPy

FROM ubuntu:14.04
MAINTAINER "Moe" <kentoseth@devcroo.com>

# Prerequisites

RUN \
  sudo apt-get update && \
  sudo apt-get -y upgrade && \
  sudo apt-get install -y python2.7 python2.7-dev python-pip && \
  sudo apt-get clean && \
  sudo rm -rf /var/lib/apt/lists/*

# END
Save a file called "Dockerfile" in: /home/[USER]/Docker/
I will just tell you 2 important things from the above code:
- Where you see the word "FROM", what this is doing is "pulling" the Ubuntu image from the remote Docker registry
- For everything after the line "RUN \", you should notice this as basic Ubuntu install commands
Now let's build our first Docker image.
Open your Terminal where the Dockerfile is (/home/[USER]/Docker/) and run this:
sudo docker build -t pybuntu .
You can rename "myapp" to anything you wish, as this is the name of your image. In this case, because it is Ubuntu + Python, you can call it something like "pybuntu" or whatever helps you recognize the image (only lowercase works). Also, you will see a ' . ' in my command above. This isn't an error, so please include it as well (you can learn about about "complex" build-procedures from the link above).
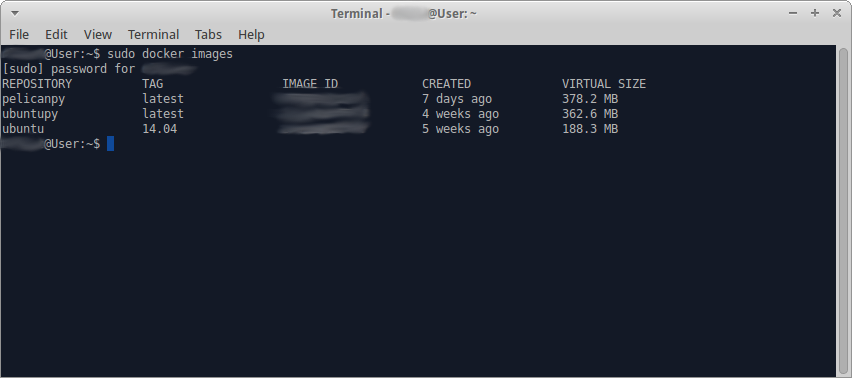
After the build process is complete, let's view our new Docker image. Run this command:
sudo docker images
and you should get this output:

From the above image, you can see I have 3 images. We haven't yet got to the "pelicanpy" yet, but if you've followed my instructions and everything worked, you should have something similar to "ubuntupy" (or myapp/image-name).
Creating a container: from 'pybuntu' image
Now that we have our image, lets use this image ( static ) to make our container ( dynamic ).
First, we can create a directory where we can "mount" files into the container from our filesystem (so that we can run them in the container).
You can create your directory here(with subdirectory called "mount/test"):
/home/[USER]/Docker/mount/test/
Now let's create a container that has a 'mounted' path from your Ubuntu/linux system.
Open your commandline (in any directory) and run the following command:
sudo docker run -i -t -v /home/[USER]/Docker/mount/test/:/test pybuntu
A quick walk-through of the line above is:
- Every "-[LETTER]" command corresponds to some commandline specification (more info on the site)
- Some commands, like "-v" have instructions that follow them. In this case, "-v" is used for mounting. First we declare the system path (.../mount/test/), then we declare the folder within the container(:/test). Note that the path in the container has to be declared
- Lastly, you call on "pybuntu", which is basically telling the container which image to use as the "dynamic" version of that "static" screenshot
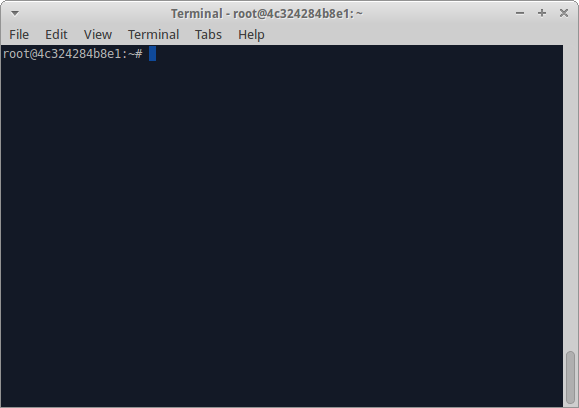
After you're done creating the container, you should see something similar to this:

From the image above, you can now see that you are a "root" user in your container.
Let's go into our mounted directory:
cd test
Once in, let's create a test python file. We will call it "hello.py". Here is the code:
#This is our test Python file

print("Hello World!")
Save your file in your mounted directory (.../mount/test/hello.py)
Now, within the container terminal, run this:
python hello.py
Hello World! should be printed out in the terminal now.
Once done, you have now successfully created your Docker Image and a Container of that Image.
I will follow up this tutorial with how to use Docker as a drop-in replacement for virtualenv (or any programming virtual environment for that matter) soon.
Enjoy containerizing everything!
(<- Email me if you find any faults or can make any improvements)
If you don't know how to use RSS and want email updates on my new content, consider Joining my Newsletter
The original content of this blog is a Waqf solely for the Pleasure of Allah. You are hereby granted full permission to copy, download, distribute, publish and share this content without modification under condition that full attribution is given to this author by creating a link either above or below the content that links back to the original source of the content. For any questions or ambiguity, you are requested to contact me via email for clarification.